With March being harvest time for wine grapes - when the grapes are ready, they are ready. The grapes don't wait and neither does the winery it is all hands on deck to get the vineyard ready and picked as quickly as we can.
With that all over and done with (apart from a tiny parcel of late ripening fruit) I was finally able to get back to my leaves.
 |
| Cretan Stitch used for the sepals. |
This next leaf stitch is using Cretan Stitch. Cretan Stitch is quite possibly my favorite stitch to use for small and long, slender leaves. I will choose this version over the more commonly Fly stitch because I just love the 'plait' that forms along the center vein of the shape
~ ~ ~ ~ Basic Cretan Stitch ~ ~ ~ ~
When you look up Cretan stitch in most Stitch book or online (there is a fine picture tutorial here ), it is usually demonstrated, stitched over four parallel line and looks nothing like a filling stitch. To me, it looks more like a staggered feather stitch.
Cretan stitch is always shown as an open stitch placed over four parallel lines. The outer lines mark the outer edges and the two lines in between, mark the cross over points along the length. Be aware, that when Cretan stitch is worked this way, it will not cover your marked lines, so use a marker that can be removed.
1) Bring the thread to the front at A, on the left outline.
Take the needle to the back at B, on the middle line furthest away from A.
Emerge at C, on the middle line closest to A, making sure the working thread is under the needle.
2) Pull the thread to. Take the needle to the back at D on the right outline.
With the thread below the needle, emerge at E, on the right middle line (directly below B).
3) Pull the thread through.
4) Keeping the thread to the left and below the needle, take the needle to the back on the left line at F (directly below A).
Emerge on the left middle line, at G (directly below C) making sure the thread is under the needle tip.
5) Continue to repeat steps 2 - 4 down the shape. As you can see, this forms a pretty, staggered line stitch with a kind of zig-zag down the middle.
6) When the stitches are placed a little closer together it begins to look a little more like a filling stitch.
Remember that if you are stitching in a hoop, you should be using the needle in a stabbing motion, rather than sliding it through the fabric as in the pictures.
~ ~ ~ ~ Cretan Stitch Leaf ~ ~ ~ ~
To use Cretan stitch for filling leaves, I place the very close together and the cross-over along the middle only just straddle the marked center vein.
To get a nice sharp tip, I start my Cretan stitch leaves in the same way as my
Fly Stitch Leaves.
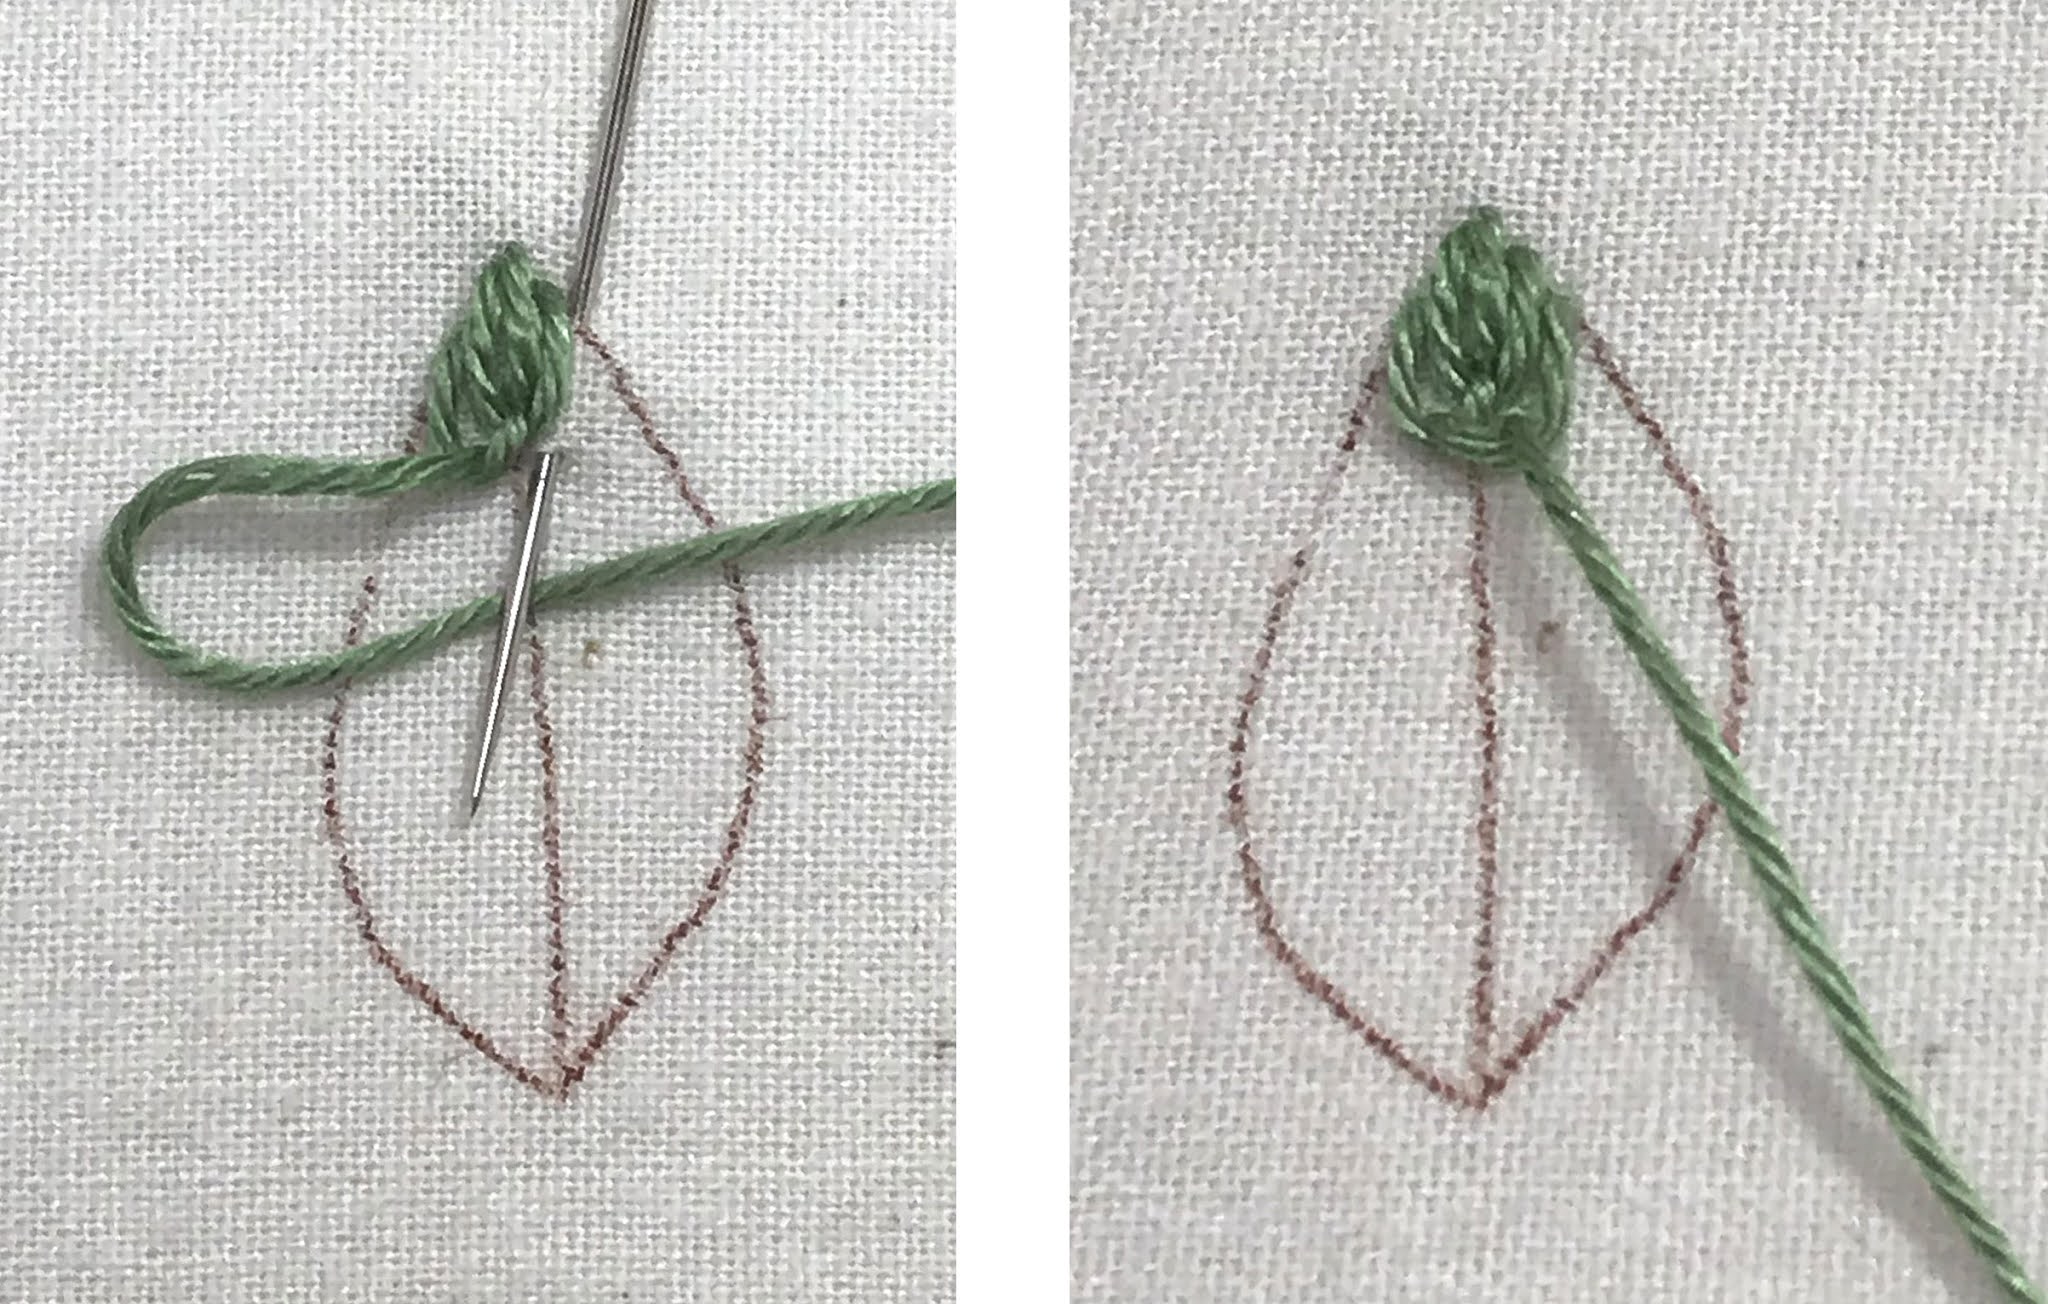
1) Start with a straight stitch from the tip of the leaf to the top of the center vein.
2) Bring the needle to the front on one side of the straight stitch.
Take the needle to the back on the other side and bring it to the front on the center vein, through the same hole as the straight stitch.
3) Move the thread to the left. Take the needle to the back on the left outline close against the previous stitch.
Emerge to the left of the center line, close against the previous stitch.
The thread should be under the needle tip.
4) Pull the thread through.
5) Move the thread to the right. Take the needle to the back on the right outline close against the previous stitch.
Emerge to the right of the center line, close against the previous stitch.
The thread should be under the needle tip.
6) Pull the thread through.

6) Continue to repeat steps 3-6 down the shape, placing each stitch closely against the previous so you get the good coverage of the shape.
7) As you move down the leaf, the stitch crossing the center vein will begin to form a plait.

When you see the Fly Stitch Leaf (left) next to the Cretan Stitch leaf (right), you can see the difference. As I said at the start, what I really like about the Cretan Stitch is the lovely plait that forms down the middle. Aside from that, I find, once you get the hang of it, it is slightly quicker to stitch - but who is in a hurry?
~ ~ ~ ~ Cretan Stitch Leaf ~ ~ ~ ~
VARIATION
I thought, I would have a try using a more open version of Cretan Stitch to fill a leaf.
As I mentioned earlier, this stitch does not cover a line, so I had to draw my little leaf differently with no apparent center vein.
I then worked the Cretan Stitch open, as it is normally shown in most stitch books. As you can see it does not cover the lines, so it will need an outline to look really nice. And although I replaced the center line with a double line, the lines are still visible under the stitches.
If I was to use this on a project, I probably wouldn't mark those lines at all, but 'wing' the placement. I do quite like the effect so who knows, you may very well see this version of the Cretan Stitch Leaf in a future project.
I have been stitching these leaves on a little tree. Since my last post, I started again after adding a few more leaves around the main tree so that I can include some of the stitch variations.
I have placed this
FREE Pattern HERE - and I will be adding to it as we finish the last leaves. But it is there, if any of you would like to play along with me.
Until next time.. Have a lovely week everyone.
Anna X
.


It's a little bit odd to read for me, but of course, in your hemisphere it is autumn ;). Your vineyard must be lots of work in the high season, and I hope it was a good harvest? Here Spring is looking around the corner :).
ReplyDeleteWonderful tutorial, Anna, thank you for sharing! Every visit I learn more about embroidery, especially how to create the more special stitches.
Stay safe, take care, Anna.
Hugs, Ilona
I know what you mean that it is odd with the opposite seasons, Ilona. Having grown up in Europe, I enjoy following the in your part of the world.
DeleteI have been in Australia for so long now, but I will never get used to Easter in Autumn, hehe
Anna X
Good morning Anna , This stitch gets me every time ! grrr ....need more practice . Thanks for another great stitch tutorial :)
ReplyDeleteI know - it takes a few goes to get your head around it but. I really hope you will persevere.
DeleteX
Once again a very clear description and tutorial, thank you Anna! Your photos make me want to take up a needle and thread.
ReplyDelete