Embroidery Hour
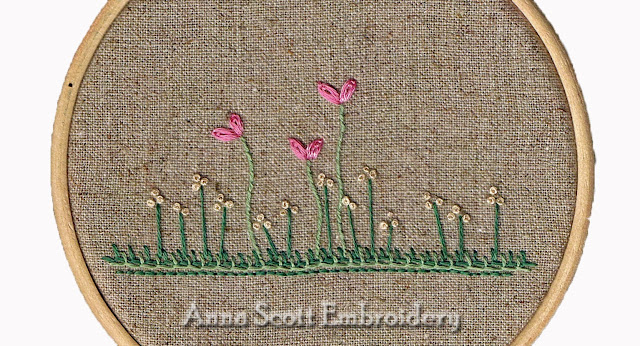
After a good chat with my friend Ellaine, I think, I worked out what to do for the embroidery workshop next weekend...
... quick, simple and easy. Well I hope so anyway. I think the trickiest part about this little workshop was to come up with something that looked nice as well as being achievable in an hour - after all how much (or little) embroidery can be achieved in an hour?
Quite a bit it seems...
This piece will hopefully give someone a taste for learning more. It uses only five stitches: Blanket stitch, back stitch, detached chain stitch, French knots and a few straight stitches, but what I particularly like, especially for this kind of workshop is that there is no need for a pattern!
If you would like to give it a go this is how
(if you are like me and prefer a printed version you can find a printable pdf HERE)
All you will need is
15cm (6") square of fabric (firmly woven cotton is preferable)
10cm (4") embroidery hoop - you can stitch in the hoop or without it
Stranded cotton (2 greens, pink and ivory)
no. 8 crewel needle (any smallish needle will do, but the crewel is easy to thread and fine enough to do the knots.)
Grass
(Blanket stitch & Back stitch)
1. Rule a line of a piece of fabric. Place it approximately 1/3 above the lower edge of your fabric
so that it fits inside the hoop.
2. Work a row of blanket stitch along the line with two strands of the darker shade of green.
Try keep the stitches relatively even in length and spacing but remember this is grass so not two blades would ever be the same!
3. Stitch a second row of blanket stitch just below the first with the two strands of the lighter shade of green. Place each stitch midway between those in the first row.
4. Use two strands of the darker green to work a row of back stitch
just below the lighter row of blanket stitch.
Stems
(Straight stitch - Back stitch)
5. Stems. Use two strands of the dark green and place long straight stitches for the stems. These can be different lengths and angles.
6. Stitch the taller stems with two strands of the lighter green. Work short back stitches
from the grass to however tall you want the flower. Bring the thread to the front at
the top of the stem and whip into the stitches on the way back down.
Flowers
(French knot - Detached chain)
7. Flowers. Using two strands of ivory, stitch three French knots at the top of each dark stem.
Wrap the thread around the needle twice for each knot.
8. Change to three strands of pink. Stitch a pair of detached chains (Lazy daisies)
at the top of a tall stem, placing each at a slight angle.
Work a second detached chain around each of the first.
and BINGO you are DONE...
It is easy to forget just how tricky managing needle and thread can be once you have had a little practise, but I hope that this is easy enough for anyone with just the slightest bit of curiosity towards embroidery to achieve.
If you are in Adelaide next weekend, - please do stop by the Sewing, Stitching and Hand craft Show to say 'Hello' at the Country Bumpkin stand.
Hope you are enjoying a lovely weekend,
Anna X


Thank you for this! I tried it the other day and found that something was let loose - my imagination. I have tried this with more stitches and colors and have been making needle cases as small gifts. In the past I have mostly followed designs I transferred to fabric, but this lets my whimsy free to roam across the fabric.
ReplyDelete