
Lacing Embroidery
Lacing embroidery in preparation for framing is quite easy. All you need is:
Firm card
Lightweight wadding or felt
Strong thread such as perle 8 for lacing.
For the card, I use a 2mm (1/16") foamcore. It is not too thick but firm enough to support the embroidery.
For padding you can use wadding, felt or even wool flannel. Putting padding behind the fabric, makes it look at little softer.
How much you want to pad your embroidery is a personal choice. If you are framing stumpwork or metal thread work for example, you might like a little thicker padding to absorb the bulkiness of wires and heavy threads on the back so that they don't create lumps on the right side of the piece. For crewelwork a single layer of felt or thin wadding is fine.

If you are planning to use ready-made frame you can use the backing board from the frame as a template. If your are going to take the piece to the framer, make sure you have enough margin around the embroidery for the mat-board to overlap.
2. Cover the card with wadding or felt. Apply glue around the edges and across the centre of the card and press it onto your wadding - then trim it to size. I find it much easier and quicker doing it this way than cutting it to size and then gluing it in place.

3. Mark the centre along each side of the embroidered piece and place it with the wrong side facing up on a padded surface - I use a piece of blanketing covered with a light coloured tea towel. Then place the padded card over the fabric with the padding towards the fabric and aligning the centre lines and marks.
4. Thread a firm, strong thread such as a perle 8 into a needle. I use it straight from the ball to begin with.

5. Fold the excess fabric over the card at the upper and lower edge. Beginning at the centre, lace the edges from side to side. The spacing of the stitches will vary depending on the size of your piece, but generally 1cm - 1.5cm is a good spacing.
As you lace towards one edge, make sure the grain of the fabric is straight along the edges. The lacing should be firm, but will not be really taut at this point. When you reach the side, secure the thread.
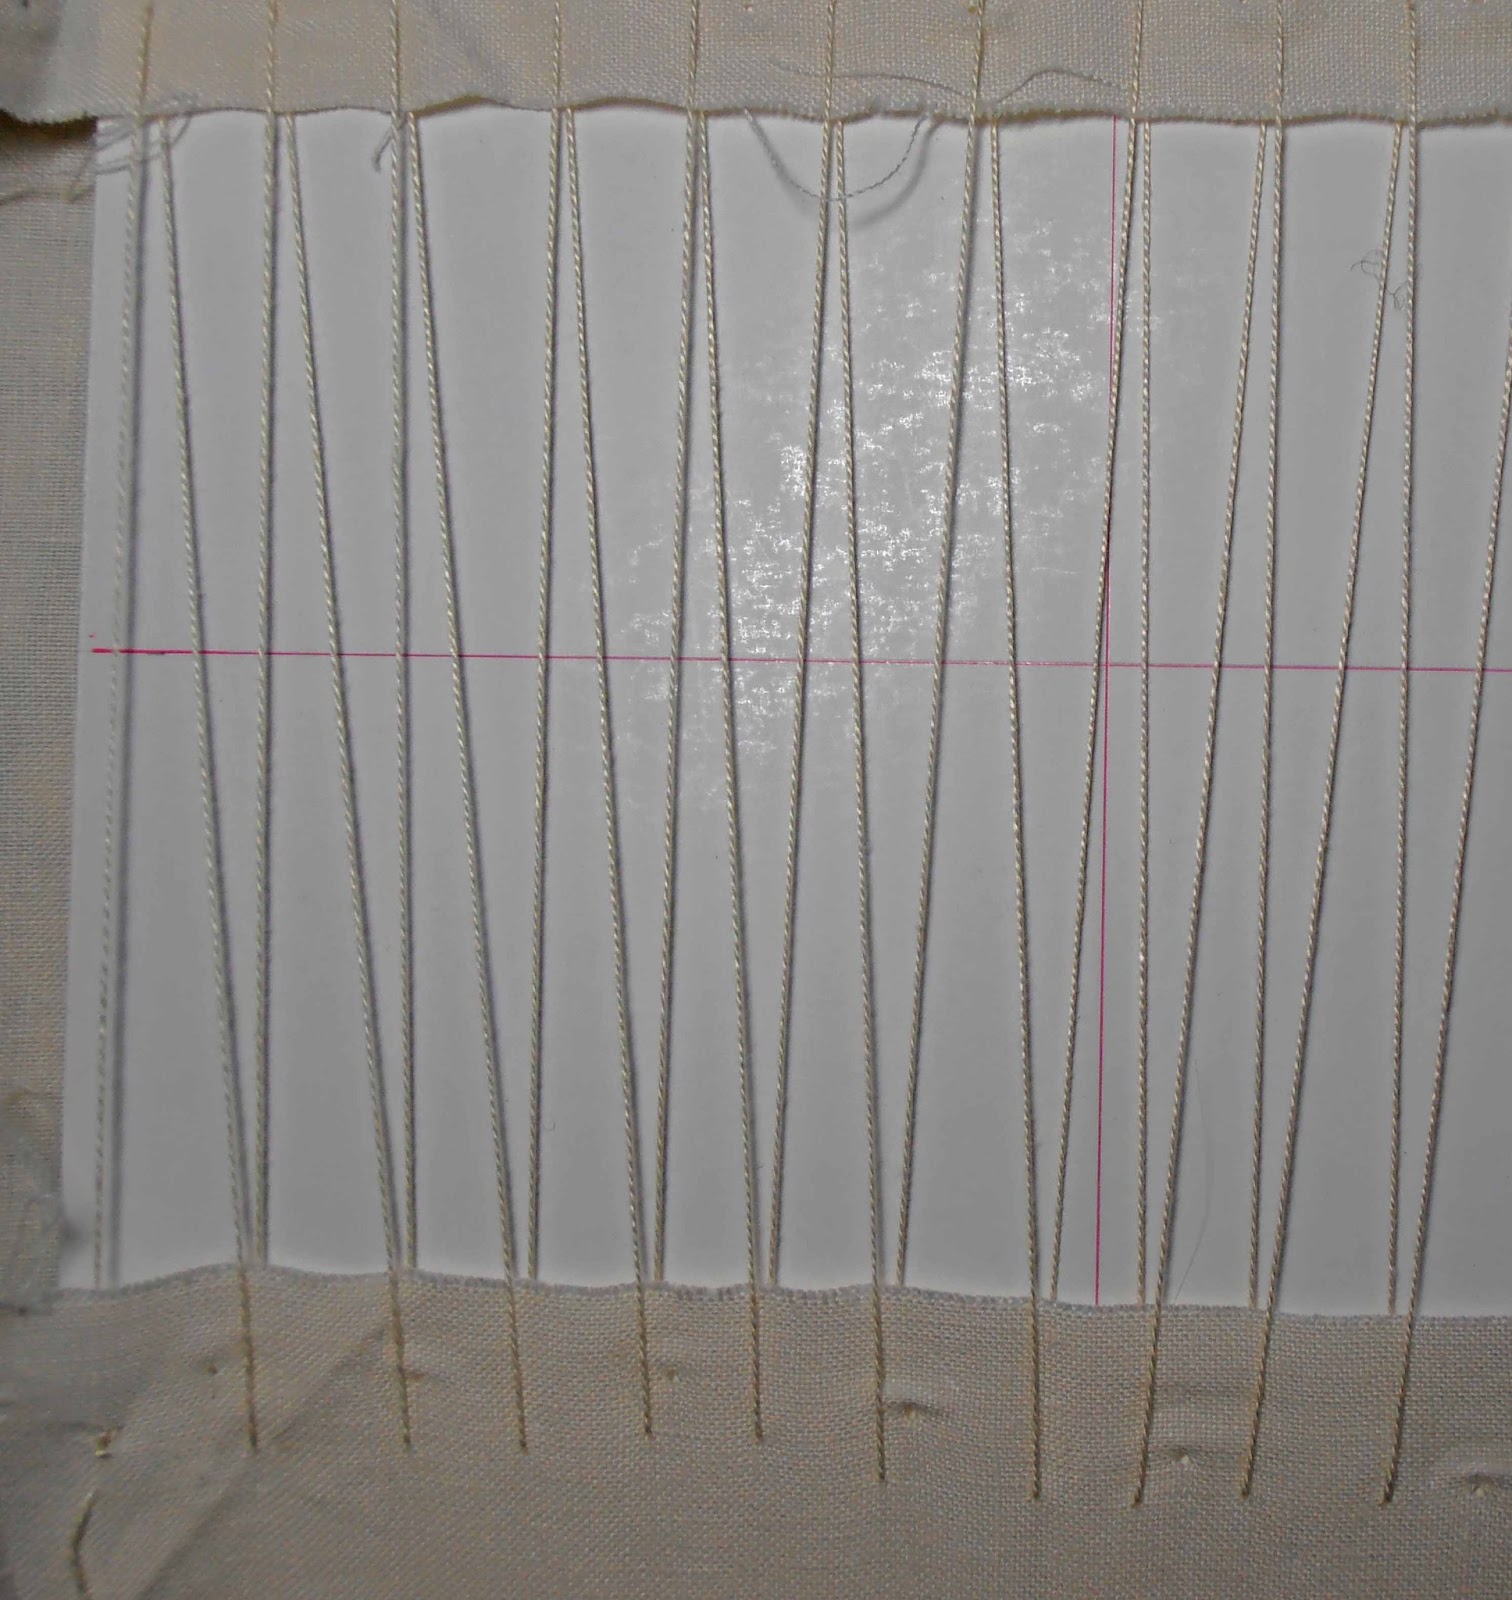
6. Next, cut the thread from the ball so that it is really long - you don't want to have to join it part way. Too long is better than too short and you will be surprised just how much thread you need. Lace to the other side as before and temporarily secure the thread.

7. Turn the piece over to check that it is neatly centred. (I forgot to do that and when I turned the finished piece, I thought it was sitting too low and I had to cut the lacing and start all over again).
When you are happy with the position, begin to firm up the lacing. It is a little bit like tightening shoe laces - start at the side that is secured and use your index and middle finger to pick up and tighten every second line of lacing, 'walking' your fingers across the back. Tighten the thread when you reach the opposite side.
You might need to do this a couple of times to get the lacing taut and even. It should be firm but not so tight it stretches the fabric and even worse, bends the card.

There is no need to mitre these corners as they will be covered by the frame or mat, but they should still be sharp, neat and flat. I use a ruler, slide it between the folded edges and use it to push the fabric taut and flat.
Thank you for this clear explanation!
ReplyDeleteThat's pretty much exactly how I do it - even down to the Pearl 8 cotton, although I use a colour I'm not getting much mileage out of.=)
ReplyDeleteahh colour! - should have thought of that before I took the pics, would have been much clearer.
DeleteThis is now my go-to tutorial for lacing - maybe I'll actually give it a go,now! It looks to be an entirely manageable process, thank you for the post. Yes please, to tutorials on anything you think might be useful. Tips from experienced embroiderers, things they do without needing to think about it, are so helpful.
ReplyDeletethanks Ellaine - trust me, I still have to think (a bit) :-)
DeleteThis is wonderful, thank you so much! I need to re-lace the section of the Bayeux tapestry reproduction I embroidered for my husband. Your notes are exactly waht I need. Thanks! :)
ReplyDeleteI am glad to hear you find this helpful, Edith. If your piece is larger, you may want to pin it along each side before you begin the lacing to help keep the grain straight. Just push the pins into the edge of the card so that they stick right out into the air. I would love to hear how you go.
DeleteLucky husband.... Anna
This comment has been removed by the author.
ReplyDeleteI pretty much do it this way too...except i use linen or quilting thread and lace pins to hold and centre the design while i'm lacing. Once i've laced, the pins come out. I have no idea why i use linen or quilting thread apart from them being strong and not adding bulk to the back.
ReplyDeleteNice blog :D
Hi Suzi,
DeleteI too use pins for some things - all depends if if the finished piece is to be framed or not. Thanks for stopping by, I am glad you enjoyed my blog. Anna
Hi Anna
ReplyDeleteThanks for the great heads up on this.
I am mounting and framing some embroidery that my wife and I got while in Viet Nam.
Regards
Mark